An IKEA Pax Hack - How to Make 2 Stunning Built-ins from One Unit
I've always wanted to attempt an IKEA hack. Even though our combination office/guestroom contains five - yes 5 pieces of IKEA furniture, I could never come up with a blog worthy hack (or one that I knew I wouldn’t hate). But the more I poured over the inspiration for this makeover, the more my mind flooded with different ways to repurpose the enormous IKEA PAX unit that was taking up so much space here. Last week's results from adding architectural features to my guest room office makeover got me pumped just enough to finally try it. It’s Week 3 of the One Room Challenge.
2019 ORC Schedule: Week 1: Inspiration // Week 2: Architectural Interest // Week 3 IKEA PAX Hack - // Week 4 - Mystery Hack // Week 5 - The 5th Wall // Week 6: Reveal Time
Affiliate links may be included in this post. This means that should you purchase a linked product, I may receive a small commission, but at no additional cost to you. To read my full disclosure click here. This hack was made possible through materials donated by Home Depot.
Prepping My Space Before the Hack
Week 2 (last week) was one of tremendous progress for me, but NONE of the projects I started are complete. Why? Everything centers around this hack. So before I did another thing in this space, I needed finally nail down a mood board. I came up with two.
The difference between them is simple but dramatic. Do I go with the tropical theme or the decidedly more feminine ink blot wallpaper? That will all be hashed by reveal day I’m sure. For now, here is the working plan for the space:
Room makeovers are a lot like putting a puzzle together. Sometimes you have to stop focusing on one area of the puzzle because the pieces for other parts of it are clearer and easier to manage. In turn, the parts that are easier to figure out play a major role in solving the hard area until finally, you’re finished. And so it goes with this room...
The crown molding has been started (I thought it would be best to learn how to do it early on). But it cannot be completed until the PAX hack is in place.
The PAX hack is partially installed but cannot be finished until a small wall to secure it has been built on either side (something we figured out mid-project).
Some of the walls have been painted but there’s still more to do because we’re building more walls, which also need to be painted.
See how it all goes round and around? Still little by little all the parts are slowly falling into place. I’m excited over seeing it all come together. And now for that IKEA hack you came here to see
Hacking the IKEA PAX Unit
While IKEA is certainly not the most luxurious furniture you can buy, its practicality is undeniable. This PAX unit has served our needs well over the years. But it is enormous and either needs to find a new home or be transformed. I opted to do the latter. The process was so simple, I'm kicking myself for not doing it sooner. The large glass front tower one the right side of the image below is our victim.
My approach to this hack was straightforward. I simply cut it in half. First though, I reinforced the joints by adding wood pieces and lots of nails to prevent shifting while cutting. And BAM! This little nip-n-tuck operation was over in about 10 minutes. But now I had to make her pretty.
While sourcing items for this makeover, I found a 3-piece set of Pottery Barn bookcase and file drawers on OfferUP . The retail value of all three pieces is over $1000. My cost however, was a mere $40 for ALL THREE PIECES! Yasss honey... that's what I'm talking about. The bookcase has been set aside for a different project. But the file cabinets now serve as foundations for the freshly hacked PAX unit.
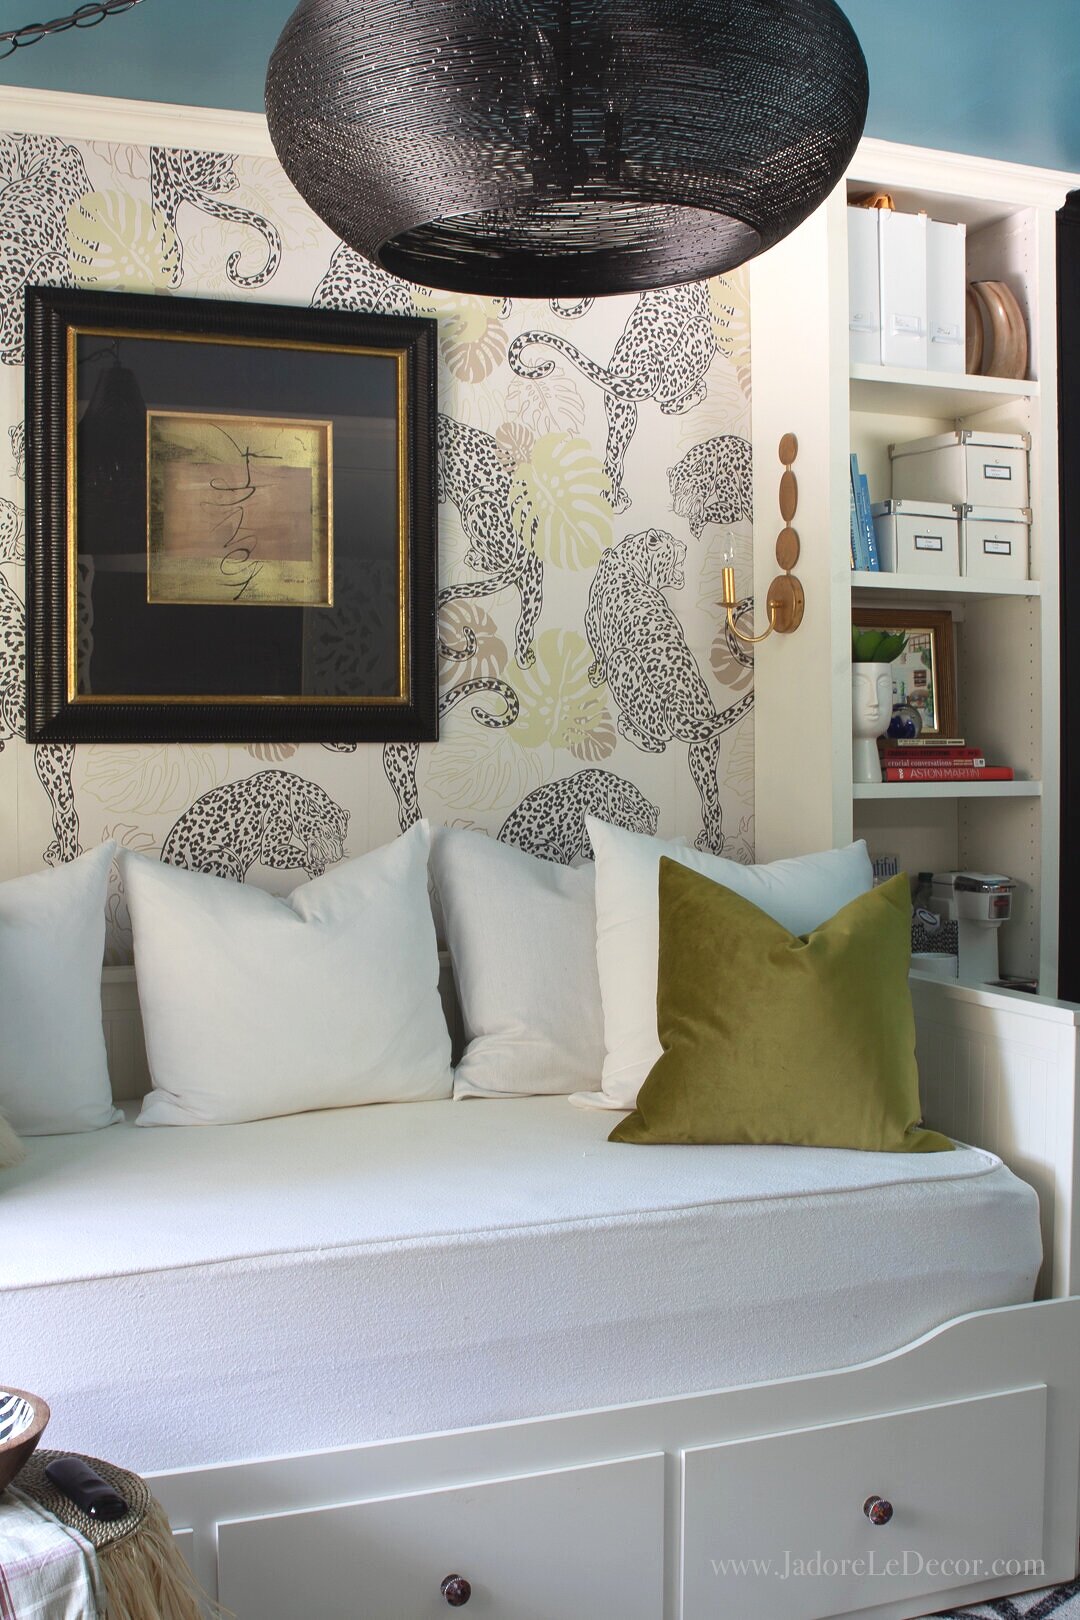
After a bit more nipping, tucking, trimming and securing with hardware, I wound up with a seamless and totally custom look. As you can see it’s not finished yet, but I promise you it will be soon.
U P D A T E
I’m excited to show you how this turned out! Below are a few photos.
If you’re wondering how I’m doing on my budget, here's where I stand:
-Furnishings $140 (I recovered funds due to some items I sold)
-Building Mat'ls $134.91
-Accessories $ 150.51
-Lighting $55
Current Standing: $480.42 ($19.58 under budget) Woo hoo! I was able to maintain my budget for this project largely due to a donation made by my local Home Depot store. Had they not assisted me with this project, I would have totally blown past my goal. A HUGE thank you to Home Depot Matteson for their generous act.
To keep up with details not captured in my blog posts, follow me on Instagram to view my highlights and stories. But for now, please let me know your thoughts on the One Room Challenge, the inspiration, or just anything in general. I love hearing from you.
*NOTE: To view the other participants in this challenge hop on over to the ORC website.


