How to Hide the TV & Create Art at the Same Time
Why are designers and stylists always obsessing over ways to hide the TV in their rooms? To be honest, I'm not exactly sure. But my inspiration ideas for this guest room/office are coming together much better than I had imagined. Finishing off a newly spruced up space with a clunky electronic hanging in mid-air off the wall just seems so utterly defeating.
All while I was researching guest room/office makeover ideas this issue played in my mind like a scratched record. So with the IKEA PAX hacked bookcases finally installed and the architectural features added, the time has come for me to deal with the 27-inch one-eyed monster. Hopefully this DIY will help it blend in with the rest of the space. Welcome to Week 4 of 6 (the toughest week) of the One Room Challenge!
2019 ORC Schedule: Week 1: Inspiration // Week 2: Architectural Interest // Week 3 IKEA PAX Hack - // Week 4 - Mystery Hack // Week 5 - The 5th Wall // Week 6: Reveal Time
Affiliate links may be included in this post. This means that should you purchase a linked product, I may receive a small commission, but at no additional cost to you. To read my full disclosure click here. This hack was made possible through materials donated by Home Depot.
Hiding the Television Affordably
Of course there is one catch to this hack. I'll only be using the items in the photo below, and the total cost MUST be no more than $40 bucks.
Trust me, I had the same look on my face that you have on yours right now. And the two items above paralyzed me for longer than I care to admit while I was trying to come up with a plan. Since my IKEA PAX hack proved that I'm really good at cutting things in half, I figured I’d start there.
The black MDF panel artwork ($5 thrifted) was the only player at first. Then I got the idea to add the giant lattice piece when I spotted it in the clearance ($20).
JUST AS I WAS ABOUT TO START CUTTING though, I realized that I only had one chance to get this right and that there was no way to fudge my mistakes. Freaked out by that possibility, I picked up my piece and headed straight to Home Depot. It took some convincing, but they finally agreed to cut it on their laser guided machine. BAM! What was hard, suddenly seemed doable. Well… sorta. Get cha’ mind ready, ‘cause there are a few intricate steps to this one.
Hide the TV and Create Art at the Same Time
The MDF panel will encase the television, while the panel will serve as a privacy screen when the television is not in use. If you don’t have a ready-made panel, a large picture frame or a DIY’d frame will suffice.
What You Will Need:
An old MDF frame (An empty picture frame or a simple DIY frame also works)
A lattice panel (This will serve as doors when cut in half)
2-4 Bungee cords (Depending on the size of your television. This television is 27”)
Felt, foam, or weather stripping to protect the sides of the television
4-6 door hinges (Be sure to choose the right size for your piece)
A jig saw or Dremel saw (I highly recommend the Dremel for better cut control)
Nail gun or finishing nails
Heavy duty D-Ring picture hangers
Wood trim pieces (optional)
Paint
The Process
Measure the television and mark those measurements on the backside of the MDF panel board. Those using an empty frame or DIY box can skips this step, as these pieces should already fit the
Be sure to center your measurements on the MDF board so that your television will fit squarely in the center of it. If you’re cutting a pop out in the center of an existing panel, take your time. A bad cut will turn this simple project into a needless hours of work. Trust me on this. I’m speaking from experience.
Cut your lattice panel to fit the opening where the television will be placed. Keep ALL of your cut pieces as you may need them later.
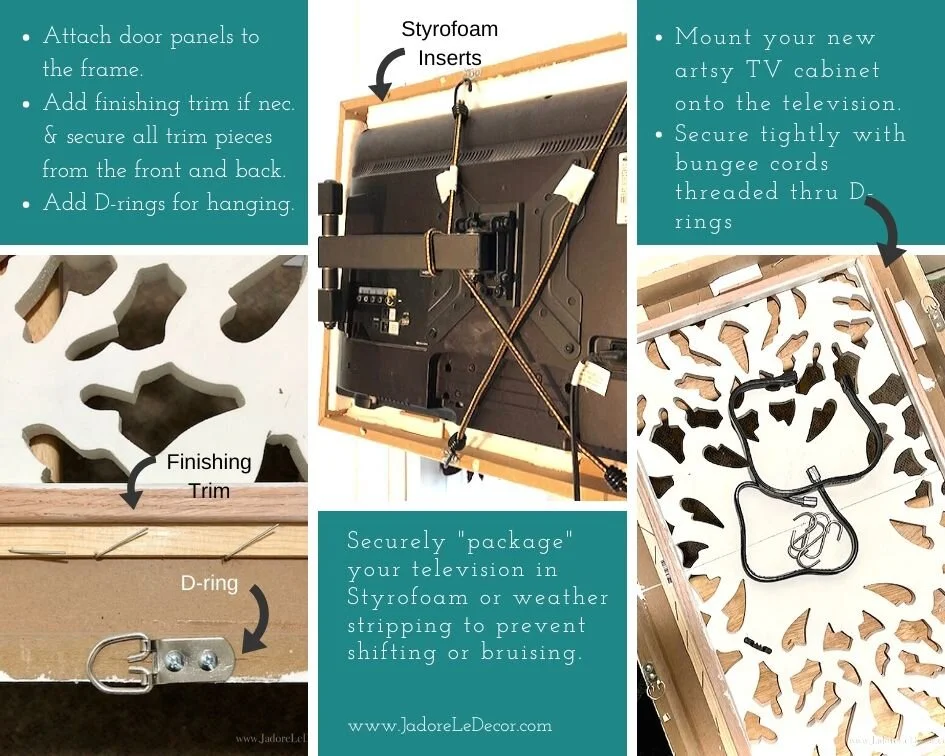
Attach your door panels onto the frame .
Paint your newly crafted TV concealer
Add D-rings to the back of your frame. Add as many as you think you’ll need.
Attach the door latch to keep the panels in place.
Use foam or weather stripping along the insides of your frame to protect the television from bruises.
Hold your piece in place using bungee cords
And FINALLY you are done!
My television is mounted off-center on the wall. Why? Regular readers of this blog already know the answer. This is probably the millionth time I've written this, but the inner walls of my home have no studs. None. The TV wall mount is actually fastened with screws, through the wall into a piece of wood located on the opposite side, inside of this room's closet. Genius, I know. That was The Husband's idea.
Fortunately, I’m able to extend the mount so that it appears to be somewhat in the center of the wall. How will I address the fact that the entire unit (now even larger) floats so far off the wall? That will be addressed in an upcoming post. Stay tuned!
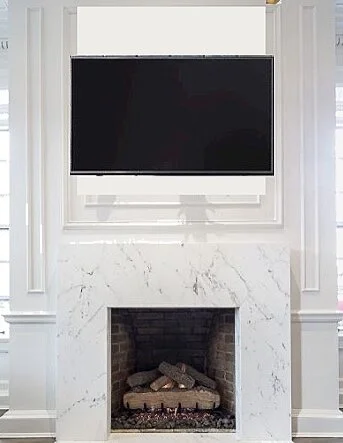
For now though, I am pleased with the results, and think it will add a nice touch to the room. For a reminder on what this space is supposed to resemble at the end of this challenge, see the images below.
To keep up with details not captured in my blog posts, follow me on Instagram to view my highlights and stories. I’d love to get your thoughts and questions on this hack, or just anything in general. I love hearing from you. Please let me know in the comments below!
*NOTE: To view the other participants in this challenge hop on over to the ORC website.


